Family Evacuation Plan 2026: Step by Step
Build your personal emergency plan
Free, no sign-up, takes 5 minutes.
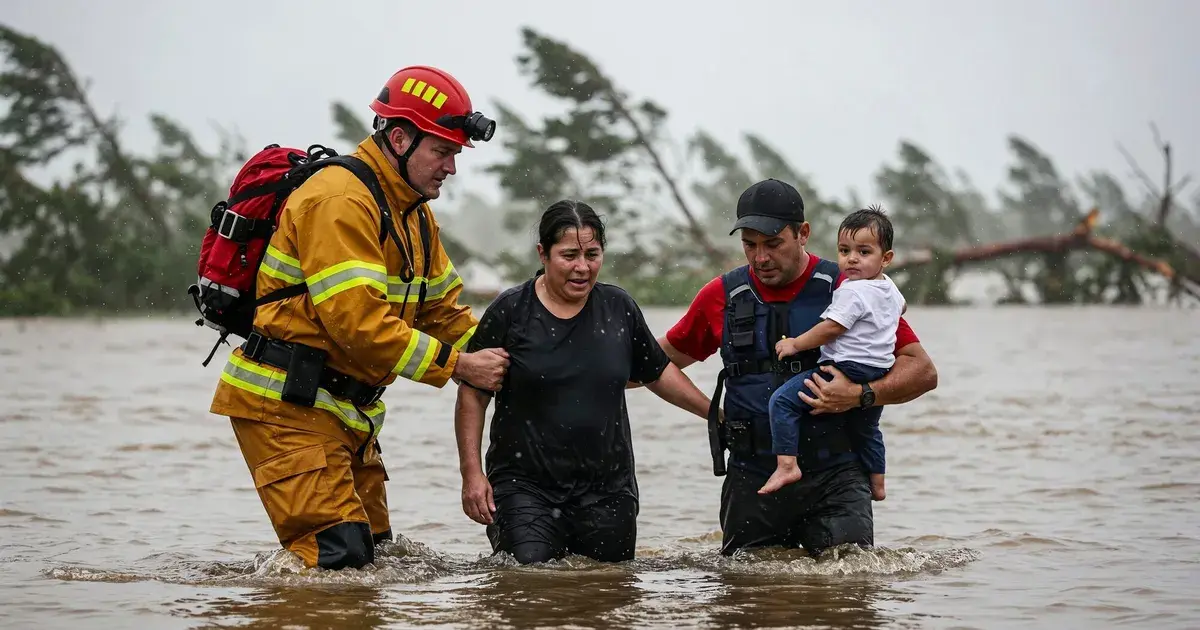
When Storm Henk hit Houston in 2017, many families had less than 20 minutes to get out of their homes. Some knew exactly what to do: the route was decided, the bag was waiting by the door, and every person knew their role. Others lost minutes searching for documents, argued about which way to go, and left without the basics.
The difference was not money or equipment. It was having a family evacuation plan step by step or not having one. And it is something you can resolve this very afternoon, without spending a pound. Our emergency planner helps you generate a personalized plan based on your family and your area in a few minutes. An evacuation plan you have never practiced is just a nice piece of paper. So let us make one that actually works.
Step 1 — Identify the Real Threats in Your Area
Before planning anything, you need to know what you are running from. It is not the same to evacuate for a flood as for a wildfire. Check the local emergency management plan from your city or county — most are available online and tell you which specific risks affect your area. gov.uk/prepare also publishes hazard maps by type of threat that help you situate your location.
For most households in the United Kingdom, the scenarios that require evacuation come down to three:
- Flooding or hurricane: water rises fast, the evacuation window can be minutes. The priority is to gain elevation or move away from the flood zone
- Wildfire: smoke reduces visibility and air quality. Evacuation is usually by vehicle and with predetermined routes from emergency management
- Industrial or chemical incident: petrol leak, toxic cloud. Sometimes the instruction is to shelter in place, not evacuate. It is crucial to listen to official instructions before moving
Note which ones apply to your home. That gives you the context to design the rest of the plan.
Step 2 — Establish Two Evacuation Routes from Your Home

A primary route and an alternate. Always two. Because the primary may be blocked, flooded, or covered in debris exactly when you need it most.
To design the routes:
- Primary route: the fastest path from your door to a safe point outside the risk zone. If you live in a flood zone, head to high ground. If the risk is wildfire, move away from the fire front
- Alternate route: a path that does not share segments with the primary. If the first goes along a highway, the second takes secondary roads
- On foot and by car: have both options planned. In a flood, a car can be a death trap in just 12 inches of water. gov.uk/prepare warns: do not drive through standing water
Walk the routes at least once on foot. On Google Maps everything looks easy. On the ground you discover that the underpass floods in any heavy rain or that the rural road has no lighting. If your family is separated during the day (work, school), each member should know their route from wherever they are to the meeting point.
Step 3 — Define a Meeting Point (and a Backup)
The meeting point is where the entire family gathers if you have to evacuate and you are not together. You need two:
- Primary point: a location known by everyone, outside the risk zone. The neighborhood park, the entrance to a shopping centre, or a nearby relative’s home
- Secondary point: for when the primary falls within the affected area. Farther away, but equally well-known. A relative’s house in another town, for example
Important rule: the meeting point cannot be your own home. Seems obvious, but it is a common mistake. With small children, make sure they can say the name of the place and the address. With teenagers, make sure they can get there without GPS, because in an emergency, cellular data is the first thing that goes down.
The Out-of-Area Contact
Designate a trusted person who lives far from your area as your emergency contact. If local lines are jammed, it is sometimes easier to call another state than three blocks away. Every family member should memorize that person’s phone number. Memorize it, not just store it in the phone, which might be dead or waterlogged.
Step 4 — Assign Clear Roles to Each Family Member

In a real evacuation there is no time to debate who does what. Tasks are decided beforehand, calmly, and every person knows exactly what their responsibility is.
A realistic breakdown for a typical family:
- Adult 1: makes the decision to evacuate, verifies everyone is ready, and shuts off petrol and electricity before leaving (if there is time)
- Adult 2: grabs the evacuation bag and takes charge of small children or the person with limited mobility
- Teenager: carries their own light backpack, helps with younger siblings, and is responsible for closing windows if the scenario is wildfire
- Children: know they must put on closed-toe shoes, grab their comfort item (do not underestimate what a familiar object does for a 5-year-old’s calm), and stay next to their assigned adult
If there are elderly family members or someone with limited mobility, their evacuation requires specific planning. If you live on an upper floor without an lift, you need a realistic Plan B for getting down. Talk to your neighbours: in many buildings they are your first source of help, before emergency services arrive.
The Document Folder
Prepare a waterproof bag with copies of driver’s licenses, health insurance cards, insurance policies, medical prescriptions, and a handwritten list of contacts. Before spending money on fancy cases, a freezer bag with a zipper seal works perfectly. If you want something more durable, hiking-style dry bags are cheap and handle water and mud.
Keep it next to the evacuation bag. If you do not have one ready yet, our 72-hour emergency kit guide shows what to include and what it costs to build one.
Step 5 — Prepare the Essentials to Leave in Under 5 Minutes
From the moment the decision is made until the entire family is outside should not take more than 5 minutes. For that, the essentials need to be prepared and accessible.
- Evacuation bag with water, food, torch, basic first aid kit, and change of clothes. If you are deciding between an evacuation backpack and a home kit, for evacuation the backpack is the clear answer
- Document folder prepared in the previous step
- Closed-toe, sturdy shoes for each family member. In a nighttime evacuation, searching for trainers with your phone torch is time you do not have. Leave them always in the same place
- Car keys and phone charger in a fixed, known location
- Daily medication for whoever needs it, with at least a week’s extra supply
What you should NOT do: stop to collect valuables or pack suitcases. In a flood that rises 8 inches per minute, every second inside is a real risk.
A problem guides rarely mention: torches stored with batteries inside for months end up with corroded batteries. Store batteries outside the torch, in a ziplock bag next to it. After two years in a kitchen drawer without touching it, a torch with alkaline batteries loses 20-30% of charge just from summer temperatures. Better option: a USB-rechargeable headlamp that you charge quarterly.
Step 6 — Do a Drill (Really, Just Reading This Does Not Count)
This is where 90% of people stop. They have noted the routes, talked to the family… and never practice. When the real alarm sounds, what seemed clear becomes confusion.
- Pick any day and tell the family you are doing a drill. First time with advance warning, later ones without
- Give the evacuation signal (it can be a code word, a phone alarm, or simply saying “we are evacuating now”)
- Time how long each person takes to put on shoes, grab their assignment, and be at the door
- Walk the primary route on foot to the meeting point. Note how long it takes
- On another day, repeat with the alternate route
The realistic goal: the entire family out of the house in under 5 minutes and at the meeting point in under 20 (on foot). If it takes longer, identify the bottleneck and fix it.
gov.uk/prepare and the British Red Cross recommend repeating the drill at least twice a year. Good timing: when daylight saving time changes, in March and November, coinciding with storm season and winter weather.
With small children, turning it into a game works better than presenting it as something serious. “Let’s see who can get their shoes on fastest” accomplishes more than any explanation about natural hazards.
Step 7 — Review and Update the Plan Every 6 Months
An evacuation plan is not a static document. Kids grow up, someone moves, the school changes, or the alternate route has construction. Every six months, review:
- Do both routes still work? Walk them
- Has anything changed in the family that affects the role assignments?
- Is the evacuation bag still in good shape? Check expiration dates on food, water, and medications. Make sure the torch and radio work
- Do all family members remember the meeting point and the out-of-area contact?
- Has the local hazard map been updated? Some cities revise their emergency plans after significant events
Preparedness is a habit, like checking the fire extinguisher. If you tie it to the daylight saving time change, it does not become a burden.
What Makes the Difference When You Have to Leave Home
You do not need expensive equipment or military training to have a family evacuation plan that works. You need an hour of conversation with your family, two routes on a map, a meeting point everyone remembers, and a real drill at least twice a year.
If you already have an overall emergency preparedness plan, the evacuation piece completes it. If you do not have one yet, the evacuation plan is a solid starting point, because it forces you to think about the essentials: what you take, how you get out, and where you go.
Preparedness is not paranoia. It is common sense applied to something you hope never happens, but that, if it does, you will be glad you thought about ahead of time.
In real emergencies, always follow the instructions of gov.uk/prepare, the British Red Cross, and official emergency services (call 911). The information in this article is guidance for preventive preparation and does not replace the advice of emergency professionals, doctors, or authorities.
This article contains affiliate links. If you buy through them, we receive a small commission at no additional cost to you. That is how we keep EmergencyKitLab running.
Prices are indicative and may vary on Amazon.
Looking for products mentioned in this article?
Products reviewed by our team on Amazon, all rated 4+ stars.
UK emergency preparedness editorial team
The EmergencyKitLab UK editorial team. Volunteers and emergency-logistics specialists adapted to British risks: Atlantic storms, flooding, power cuts and heatwaves.
Frequently Asked Questions
How many evacuation routes should a family plan include?
How do you choose a good family meeting point?
How often should a family practice an evacuation drill?
What if the family is separated when the emergency happens?
Should children have their own role in the evacuation plan?
Related Articles
72-Hour Emergency Kit 2026: Checklist + Budget (Family)
EmergencyKitLab 2026 guide: complete 72-hour kit checklist from £50/person. Winter Storm Uri-tested tips + the #1 water mistake families still make.
15 min readBest 72-Hour Survival Backpack 2026: £40 Beats £150
EmergencyKitLab UK 2026 test: 5 survival backpacks compared. The £40 pick outlasts £150 models, holds 12 kg — and the one you should skip.
12 min readEmergency Preparedness: The Ultimate Guide for UK Families
Complete emergency preparedness guide for British households. gov.uk/prepare-based checklists, real budgets, and the mistakes most people make.
18 min read