72-Hour Survival Bag: Complete Checklist Organized by Weight
Build your personal emergency plan
Free, no sign-up, takes 5 minutes.
When Hurricane Ian hit southwest Florida in September 2022, the difference between families who evacuated in minutes and those who took over an hour scrambling for supplies often came down to one thing: having a bag ready to go. Not the most expensive one. Not the most complete. A 72-hour survival bag sitting by the front door, packed with just enough for three days, organised so you could find what you needed even in the dark.
What you will find here is not an endless list of objects. It is what actually fits in a 35-to-45-litre backpack, how much each item weighs, and how to place everything so the first aid kit does not end up buried under three changes of clothes when you need it at 4 in the morning.
72-Hour Survival Bag: What It Is and How It Differs from a Home Kit
A 72-hour survival bag is basically a backpack you grab and go. Three days of self-sufficiency on your back. gov.uk/prepare has been recommending that every household maintain one for years. The British Red Cross, local emergency management agencies, and pretty much every organisation that deals with disasters all repeat the same message: three days. That is the window you need to cover on your own.
The difference from a home kit? The home kit stays put — it takes up more space, weighs more, and is designed for sheltering in place. The survival bag goes with you, and that changes the rules completely. Everything you pack gets filtered through one brutal criterion: if you cannot carry it while going down the stairs of your building, it does not belong.
Each adult should have their own. Kids over 10 carry a reduced version (maximum 10-12% of their body weight). Younger children do not carry a pack; their items get split among the adults.
If you are not sure whether you need a portable bag or a stationary home kit, start with our comparison between go-bags and home kits.
What to Pack in a 72-Hour Survival Bag: The Weight-Filtered List
The question here is not “what would I like to carry” but “what can I actually haul without wrecking my back after a mile.” The priority order: water, shelter, light and communication, food, first aid, documents, and tools. If you want detailed calculations for gallons per person and calories per day, you will find them in our complete 72-hour emergency kit guide. Here we focus on what fits in 35-45 litres without blowing out the seams or your spine.
Our process: We analyzed manufacturer specs, reviewed real user opinions from prepper forums and survival communities, checked official manuals and guides from organizations like the British Red Cross, gov.uk/prepare, and local emergency agencies, and cross-referenced with practical, hands-on experience — opening stored kits, testing filters, and measuring the real-world battery life of power banks.
Water: The Minimum You Can Carry and Still Walk
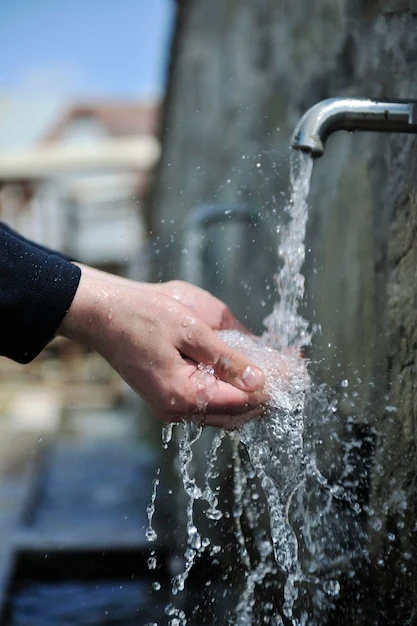
Water is the heaviest item and the first thing you need. Three litres weigh over 6 pounds, and once you add the rest of the gear, your mobility takes a real hit. The solution is to carry 1 to 1.5 litres in rigid bottles for the first hours and a purification system to refill along the way.
If you need to compare filters and tablets with current prices, check out our water and hydration product selection. The Sawyer Squeeze weighs 2 ounces and filters bacteria and protozoa through its 0.1-micron hollow fiber membrane — small enough to catch E. coli, Giardia, and Cryptosporidium. But viruses, which measure between 0.02 and 0.2 microns, pass right through. And what the product listing does not tell you is that the flow rate degrades after 130-180 gallons with turbid water, because sediment gradually clogs the membrane. For 72 hours with relatively clear water? It works fine. But if the water comes from an urban flood zone with possible human fecal contamination, the Sawyer alone is not enough: you need to pair it with tablets or UV treatment.
Another option: Aquatabs purification tablets (under 2 ounces for the pack). They eliminate bacteria, viruses, and protozoa — 30 minutes for bacteria and viruses, up to 120 for protozoa. The fact that they cover viruses is precisely what makes them a good complement to a filter. But do not rely on them alone if you are thirsty right now. Those wait times feel eternal when you have been walking for hours and stress is drying out your mouth.
And before buying anything, consider this: can you refill at urban water fountains along your evacuation route? Sometimes a collapsible container and knowing where the water sources are is worth more than the most expensive filter on the market.
Food: Calories per Ounce, Not Cans
Forget cans in the backpack. Each small can adds 7-14 ounces of dead weight for a caloric contribution that does not justify what it weighs. For 72 hours, energy bars, trail mix, and freeze-dried food weigh between 14 and 21 ounces total. With cans, you are looking at 2-3 pounds for the same calories. The difference when you are carrying it on your back is brutal.
Freeze-dried food lasts as long as it does because the drying process removes 98% of the water (which is what enables deterioration reactions), and the nitrogen-sealed packaging eliminates the oxygen that causes oxidation. But that is under optimal storage conditions. In a garage at 95 degrees in summer, that shelf life drops considerably. That is why checking the food in your bag every 6 months is not bureaucracy — it is what separates a functional kit from one that gives you unpleasant surprises exactly when you cannot afford them.
Choose food that does not require cooking or fire. And one thing about food safety that most people do not know: if any can has dents along the seams or is swollen, discard it without opening. Damaged seams can allow Clostridium botulinum to enter. Not worth the risk over a can of tuna.
Light, Communication, and Power
A LED headlamp (3-5 ounces) keeps your hands free, which is exactly what you need when you are walking at night with a backpack on your back. Lithium batteries maintain their charge for 15 to 20 years because their internal chemistry has a minimal self-discharge rate compared to alkaline. Alkaline batteries inside a stored torch lose 20-30% of their charge within 12 months and leak potassium hydroxide that irreversibly corrodes the metal contacts. If you have ever opened a torch that sat in a drawer for a year and found a white crust on the contacts, you know exactly what I mean. Always store batteries outside the device, in a separate ziplock bag.
After reviewing dozens of opinions from prepper forums and cross-checking with manufacturer specs from Energizer and Duracell, the pattern is clear: lithium batteries cost 3-4 times more, but the peace of mind knowing they will still work in 10 years more than makes up for it. This is one of those cases where cheap really does cost you more.
The power bank. A 20,000 mAh unit weighs between 12 and 16 ounces and gives 3-4 real smartphone charges — not the 5-6 the box claims. The voltage conversion from 3.7V internal to 5V USB eats 25-30% of the nominal capacity. That is just physics. Stored for 6 months, it loses another 15-25% from self-discharge. Recharge it to 60-80% every 3 months to keep the lithium cells healthy; letting it drain completely is one of the worst things you can do to a lithium battery.
And the hand-crank emergency radio with solar panel (10-14 ounces). During a widespread blackout, when your phone battery dies and the cell towers go down, the radio is the only thing still working.
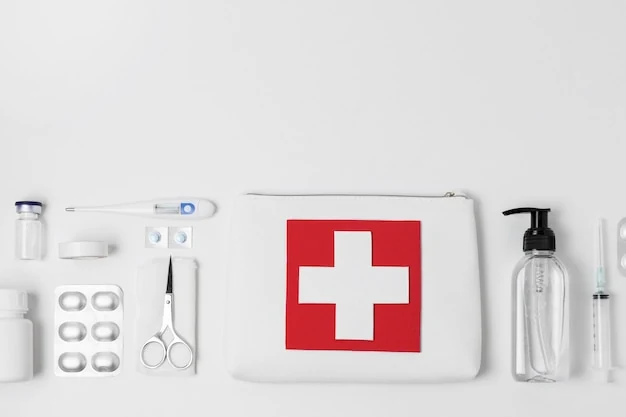
First Aid Kit, Documents, and Tools
A compact first aid kit (10-18 ounces). Add your regular medications: it is what most people forget and the first thing they miss. If you take chronic medication, consult your doctor about how much backup supply to include and how to store it properly — a garage at 104 degrees in August is no place for insulin or many other medications.
Essential documents in a laminated copy inside a waterproof bag: driver’s licence, health insurance card, insurance policy, emergency phone numbers. And cash in small bills, between £100 and £200. When the grid goes down, ATMs do not work and the card reader at the store does not either.
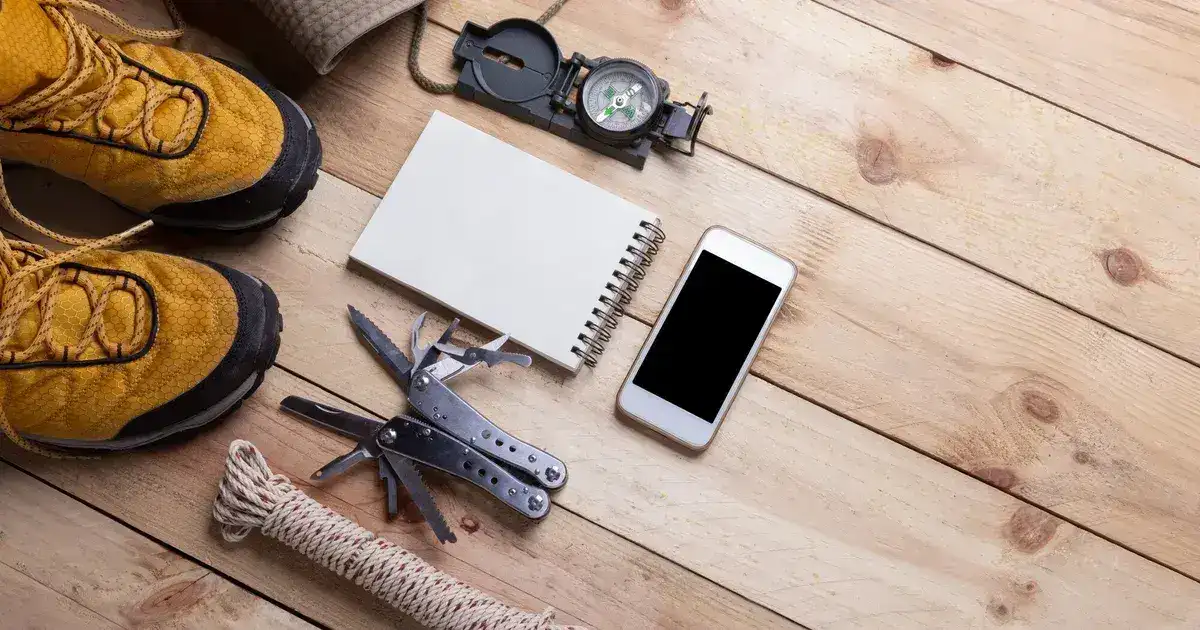
A multi-tool like the Leatherman Wave+: 8.5 ounces, 18 functions including can opener. Compact change of clothes by season: 1-2 pounds. Emergency thermal blanket: under 2 ounces that can substitute for a sleeping bag weighing 3 pounds in a short emergency. It is not equally comfortable (I will not lie, sleeping with a crinkly mylar blanket is not pleasant), but it retains up to 90% of body heat and for 72 hours of evacuation, it does the job.
And keep a pair of closed-toe shoes near the bag or tied to it. In real evacuations during floods, people ended up walking through contaminated water, mud, and debris. Flip-flops do not protect against broken glass or nails.
With our emergency planner you can calculate the exact components based on the number of people and days of self-sufficiency you need.
How to Organize the Survival Bag by Zones: The Method Professionals Use
This is where most guides fail. They tell you what to pack, but not where to put it. And when you need the first aid kit at 3 in the morning without light, emptying half the backpack is not an option.
We have reviewed kits stored for over a year under normal household conditions (entryway closet, variable temperature between winter and summer) and consulted with experienced users from prepper forums. The conclusion is uncomfortable but clear: organisation matters as much as contents. A perfectly equipped kit that is poorly organised is almost as useless as having no kit at all.
There are only two rules that matter: the heavy stuff goes against your back and centred (otherwise the swaying wrecks you in half an hour); and what you might need first has to be where you can reach it without searching.
Zone 1 — Bottom of the Pack: Heavy and Rarely Accessed
Compact change of clothes, rolled emergency blanket, lightweight sleeping bag if you choose to carry one. You only touch this when you stop to rest. At the bottom, it also stabilizes the pack.
Zone 2 — Center, Against Your Back: The Heaviest Items
This is where bottled water and dense food go. The weight should be as close to your back as possible and vertically centred. If you make the mistake of putting it in the front or on the sides, the swaying exhausts you in under 20 minutes — and I mean 20 real minutes of walking, not the quick test down your hallway. The difference between a well-loaded and a poorly loaded pack is night and day once you have been walking for a while.
Zone 3 — Top Section: Frequent Access
Energy bars, trail mix, collapsible water container. The stuff you need every few hours without having to open the entire pack. Can you reach in from the top and grab a bar without undoing anything? Then it is organised correctly.
Zone 4 — Side Pockets and Top Lid: Immediate Access
Headlamp, first aid kit, documents in waterproof bag, cash, whistle, multi-tool. This is the zone that saves you when something happens inside what is already happening. If you need to treat a cut, if you need light, if someone asks for identification at a checkpoint — you cannot afford to search. Five minutes rummaging during an emergency feels like an hour.
Zone 5 — Exterior: What Does Not Fit or Does Not Need to Be Inside
Spare footwear tied to the straps, foldable mat, heavy-duty rubbish bags (which work as an improvised poncho, a tarp, or a sanitary waste bag). Accessible without opening anything.
For modularizing by zones, the cheapest solution is large colored ziplock bags. Each module in its bag: water, food, first aid, documents. You find them by touch in the dark if they are always in the same spot. If you want something more durable, heat-sealed dry bags protect documents and electronics from water for around £15. But a 50-cent ziplock works to start and handles most situations.
How Much Your Survival Bag Should Weigh (and How to Cut It If You Are Over 26 Pounds)
The rule, based on firefighter training protocols and WHO recommendations on physical load, is not to exceed 15-20% of your body weight. For someone at 130 lbs: max 20-26 lbs. At 155 lbs: 23-31 lbs. At 175 lbs: 26-35 lbs.
A well-built 72-hour survival bag weighs between 15 and 22 pounds without water, or 20-26 pounds with 3 litres. If yours is over 26 pounds, it is time to trim.
Where you actually save weight:
- Water: Purification tablets + collapsible container instead of 3 litres of bottled water. Savings: over 4 pounds. The catch: you need a water source on your route, and that means having planned it ahead.
- Food: Freeze-dried instead of cans. Savings: 1.5-2 pounds over 72 hours. More expensive, yes, but half the weight and your back notices from the first mile.
- Shelter: Emergency thermal blanket at 2 ounces instead of a sleeping bag at 2-4 pounds. Not as comfortable, but for 72 hours of emergency, it works.
- Flashlight: LED headlamp at 3-5 ounces instead of a large handheld torch at 12 ounces. And hands-free, which matters more than it seems.
The test everyone should do but almost nobody does: put the loaded bag on and walk down the stairs of your building. If you cannot do it without stopping or losing your balance, there is too much weight. It is not theory — it is one of the most repeated tests in prepper communities because it works.
“The biggest mistake in home preparedness is thinking you are ready because you bought a kit. Without practice, without an evacuation plan, and without knowing how to use the gear, the kit is not worth much.” — Emergency management instructor, during community preparedness training
For people with back or knee problems, consult your doctor before carrying more than 18-22 pounds.
Mistakes That Ruin a Survival Bag (Learn from Those Who Already Made Them)
Not testing the loaded pack before you need it. The classic. Most people assemble it, store it in the closet, and never touch it again. When they need it, they discover it weighs too much, the shoulder strap rubs, or the straps do not adjust well over a winter jacket. Load it up and walk 30 minutes this weekend. It is the most useful thing you can do for your preparedness without spending a pound.
Putting the first aid kit and torch at the bottom. When you need first aid, you need it now. Not in 5 minutes, after emptying half the pack kneeling on the sidewalk. Upper or side pockets, always in the same spot. Practice pulling them out in the dark at least once.
Storing batteries inside devices for months. Alkaline batteries leak potassium hydroxide that destroys contacts. When I opened my torch after a year without touching it, the contacts had a useless white crust. And the problem is not just that the torch does not work: KOH is corrosive. If you touch it with your hands, wash with water immediately. To clean affected contacts (if they are not too far gone), a cotton swab with white vinegar neutralizes the alkali and sometimes saves the device. Batteries in a separate ziplock bag, always. Or lithium batteries if you can afford them — they cost more, but last 15-20 years without issues.
Not checking expiration dates. Purification tablets lose effectiveness after 6-8 months with the container opened if moisture gets in. Bars expire. The power bank self-discharges 15-25% in six months. Even ziplock bags crack after 2-3 years in a storage closet with temperature swings. Set a phone alarm every 6 months. Open the bag, check everything, and recharge what needs it. It is half an hour twice a year. No excuses.
Buying a pre-made kit and assuming it is complete. Those “47-piece survival kit” bundles on Amazon include safety pins, clips, and plastic whistles to inflate the count and look good in the photo. The food portions cover 800 kcal/day when the minimum for 72 hours should be at least 1,500 kcal, ideally close to 2,000. Build piece by piece. It costs the same (sometimes less) and you know exactly what you are carrying and where everything is.
What experienced preppers repeat every time:
- Start with the basics and cheap items before investing in expensive gear
- Test the kit before you need it — knowing how to use that filter in the dark is what separates being truly prepared from having a nice box
- Actually rotate the supplies, not just plan to do it
- Do a family drill: how long does it take you to get out the door with the pack? If it is more than 10 minutes, you need to optimize
If you want to dive deeper into the most common mistakes, For choosing the backpack itself, our best 72-hour survival backpack comparison analyzes specific models with real prices and durability data, and you can browse ready-made go-bags and emergency kits if you would rather start from a complete pack.
Frequently Asked Questions About 72-Hour Survival Bags
Tactical backpack or hiking backpack?
Hiking. Without question. Tactical MOLLE packs do not have a proper hip belt: they load all the weight onto your shoulders and after 20 minutes with 22 pounds it hurts. They weigh 7-14 ounces more for the same capacity. And in a civilian evacuation setting, a camo tactical bag screams “I am carrying valuables” — the exact opposite of what you want during an evacuation. A hiking pack of 35-45 litres distributes weight between hips and shoulders, and blends in. This is one of those cases where the dominant opinion in Amazon reviews (“the tactical one looks cooler”) clashes with the real experience of people who have walked with 22 pounds for more than 20 minutes.
Where do I store the bag if I live in a small apartment?
Entryway closet, by the front door, or under the bed in the master bedroom. The key is being able to grab it in under 5 minutes, as the British Red Cross recommends.
Does each family member need their own bag?
Each adult carries their own. Kids over 10 carry a reduced version with a maximum of 10-12% of their body weight. Younger children do not carry a pack: their supplies get split among the adults.
How often should I check the contents?
Every 6 months minimum. Verify expiration dates on food and purification tablets, recharge the power bank to 60-80%, make sure batteries are outside devices and not leaking, and replace any ziplock bags that have cracked. We continue reviewing products and updating our comparisons so you always have reliable information.
How much does it cost to build a 72-hour survival bag from scratch?
Between £80 and £250 building it piece by piece. For a more detailed list with prices, check our complete 72-hour emergency kit guide for families.
What matters is not having the most expensive or most fully equipped backpack. It is having one. Well organised and that you can carry. It does not need to be perfect.
It needs to exist.
If you want a step-by-step guide for building your bag from scratch, we have a tutorial on how to build your evacuation bag that breaks it down into 6 clear steps.
Start this weekend. Grab a backpack you already own, pack the basics following the zones we covered, and do the staircase test. If you can go down three flights without stopping, you are on the right track. And if you discover something does not work or weighs too much on the way down, better to know now than at 3 in the morning with the sirens going off.
Prices shown are approximate and may vary. Check the current price on Amazon before purchasing. EmergencyKitLab is a participant in the Amazon Associates Program, which means when you buy through our links we receive a small commission at no additional cost to you. We only recommend products we consider useful. Survival and emergency products require proper training to use correctly. In real emergencies, always follow the instructions of gov.uk/prepare, the British Red Cross, and official emergency services (call 911).
Prices are indicative and may vary on Amazon.
Looking for products mentioned in this article?
Products reviewed by our team on Amazon, all rated 4+ stars.
UK emergency preparedness editorial team
The EmergencyKitLab UK editorial team. Volunteers and emergency-logistics specialists adapted to British risks: Atlantic storms, flooding, power cuts and heatwaves.
Frequently Asked Questions
How much should a 72-hour survival bag weigh?
What size backpack do I need for a 72-hour bag?
How do you organise a survival bag so you can find things in the dark?
Should children have their own survival bag?
Related Articles
72-Hour Emergency Kit 2026: Checklist + Budget (Family)
EmergencyKitLab 2026 guide: complete 72-hour kit checklist from £50/person. Winter Storm Uri-tested tips + the #1 water mistake families still make.
15 min readBest 72-Hour Survival Backpack 2026: £40 Beats £150
EmergencyKitLab UK 2026 test: 5 survival backpacks compared. The £40 pick outlasts £150 models, holds 12 kg — and the one you should skip.
12 min readWater Filter vs Purification Tablets: Which Is Better for Your Kit
Portable water filter or purification tablets for your emergency kit? Honest EmergencyKitLab UK comparison with real testing data and our recommendation.
10 min read